Domain is the address of the site by which the site can be found on the web. If you want to connect your own domain (that is, for the project to open at an address like http://mysite.com), you need to do 3 steps:
⠀⠀⠀⠀⠀
1) Buy domain
You can buy a domain from domain registrars. There are many such services, you can find them in a Google search on the request “buy a domain”.
2) Specify the domain in the project settings on the platform
Go to the project settings, specify the domain and save the changes. The system will prompt you for the optimal address of the С-NAME-records for your site, which must be set on the side of the registrar. Most likely, it will be projects.web-ar.studio, but if you are shown another – then use it.
3) On the registrar’s website, specify the records for the domain
To do this, add an С-NAME record in the DNS management zone and register the value: projects.web-ar.studio for it.
How to specify a domain in the project settings on the platform
Go to Project Settings and specify your domain. Click “Connect Domain”
If the domain is not yet connected, a message will appear with the address of the С-NAME-records, which must be added according to the instructions below. If you have already done everything according to the instructions, then with a high probability the DNS is still being updated, this can take up to 24 hours.
⠀⠀
How to specify С-NAME record on the registrar’s website
You need to add an С-NAME record for the main domain. This can be done in the domain control panel (usually called “DNS zone management”)
You do not need to change the name servers (NS records) for your domain.
If your registrar does not provide default DNS servers, please order this service separately. Or use a service that provides DNS hosting for free.
⠀⠀
For the main domain
For example: mysite.com
Go to your domain control panel
In the domain settings, find the section like “Add a record to DNS”
Add a C-NAME record with the address projects.web-ar.studio
If you have other С-NAME records for your primary domain, delete them. There can be only one С-NAME record for a domain, otherwise the domain will not work.
⠀
For subdomain
For example: sub.mysite.com or www.mysite.com In the domain settings, specify the С-NAME record with the value projects.web-ar.studio
All changes can take from 3 to 24 hours.
⠀
If the records have taken effect, then a message will appear in the domain connection that everything is fine and the domain is connected correctly. In this case, the site is already working on the domain.
In the technology development world, augmented reality is rapidly becoming a valuable skill across industries ranging from graphic design and marketing to corporate training and development. With the slowdown in many business sectors due to the COVID-19 pandemic, many have the opportunity to spend time improving their augmented reality skills.
This is where Web-AR.Studio can help. AR.Studio is our most powerful and versatile content creation tool. It supports 3D models, custom animations, and various tracking types, and is surprisingly easy to learn. We also have a number of educational resources available for free, including tutorials.
The only thing that unites us all here at Web-AR.Studio is that we all sat down at one point or another as newbies, so we decided to combine our knowledge and come up with some useful tips that we would like to know before than to learn how to use Web-AR.Studio.
⠀⠀⠀
Getting to know the basics
Get started in a 2D editor using our easy-to-use AR.Studio templates
Creating projects using templates Web-AR.Studio
⠀⠀⠀
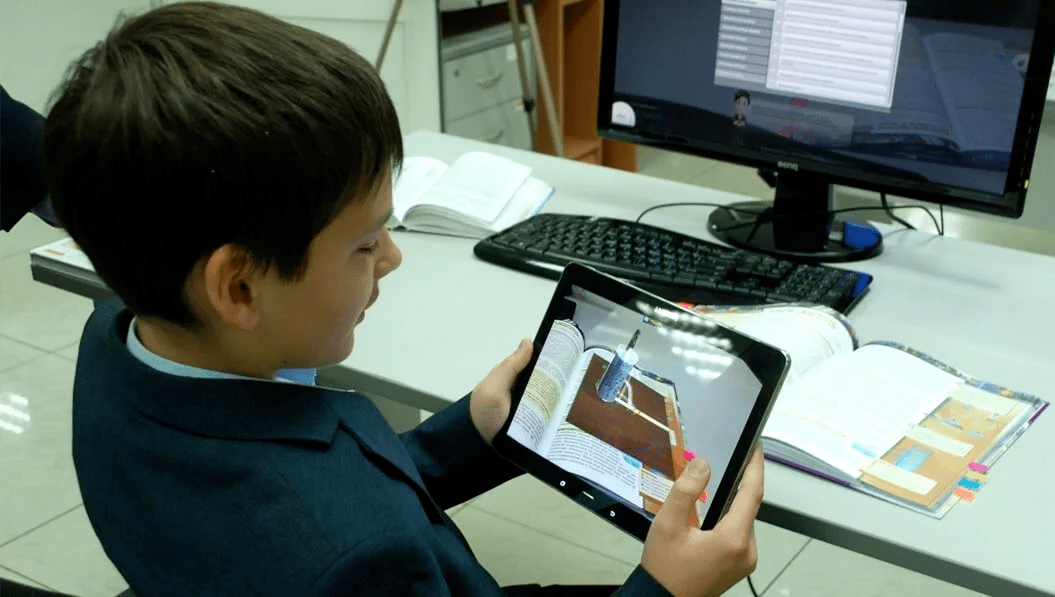
Start with image recognition (Live Photos)
We recommend starting with the simplest. Perhaps most famous in augmented reality, Live Photos are a great first step, showcasing a number of different features with a very recognizable use case at the end.
Align your video and images using Web-AR.Studio, making sure that the first frame of the video and the image is the same. This is the easiest way to create a “animate” effect that immediately brings the WOW effect after scanning the QR code.
Template project: AR Pack. Interactive quiz
⠀⠀⠀
Get to know the Web-AR.Studio analytics system
We believe that understanding our dedicated analytics dashboard is key to building successful AR projects using data.
Analytics can be accessed through your Web-AR.Studio account and can provide a range of analytics, including how many users crawled your project, where they clicked, and how long they stayed in augmented reality.
⠀⠀⠀
Join the forum Web-AR.Studio
Our Web-AR.Studio community forum is a priority for new Studio users.
“Whenever I faced obstacles, I realized that the Web-AR.Studio community is a great place to find people who were in a similar position and can provide answers. Everyone is very kind and ready to help each other make the most of the platform.”
At its best, augmented reality is an interactive storybook that briefly makes the end user suspend their disbelief and feel like their physical environment is integrated with digital content. As an augmented reality designer, your goal is to surprise and delight users while maintaining immersion throughout the entire process.
A good comparison is a magician pulling a rabbit out of a hat – you know he put a rabbit in there, but that destroys the illusion if you see him doing it. Here are some practical tips to help make sure you never get caught hiding your bunny in a hat or with cards up your sleeve.
⠀⠀⠀
Bring your image to life with video and animation
When designing a project for a client, try to make sure that the first frame of the video matches the trigger. By juxtaposing the two, you get the ability to move elements that exist on a physical target that you don’t need, and inject those pieces of content that you do. If something just appears on the screen that has nothing to do with what existed before, this is a sure way to destroy the magic.
For Web-AR.Studio users, we recommend using the first frame of the video as part of the tracking image. This is the easiest way to create a “liven” effect that immediately benefits when your target audience scans your code. If you plan to use video in the designer, video editing tools such as After Effects or Premiere Pro can be great for animating components of the target image. Or, you might even decide to use animated graphics created in third-party software.
Find out how easy it is to animate images with Web-AR.Studio
⠀⠀⠀
Break the fourth wall
AR is designed to act like another layer of reality, making you, as a user, a part of it. If you have a 3D character standing on a trigger, why not make him turn to face you when you look at him from a different angle? Have your character look up at the user instead of straight into the distance like in a theatrical production, making sure everything is done with the awareness that the audience should be watching.
⠀⠀⠀
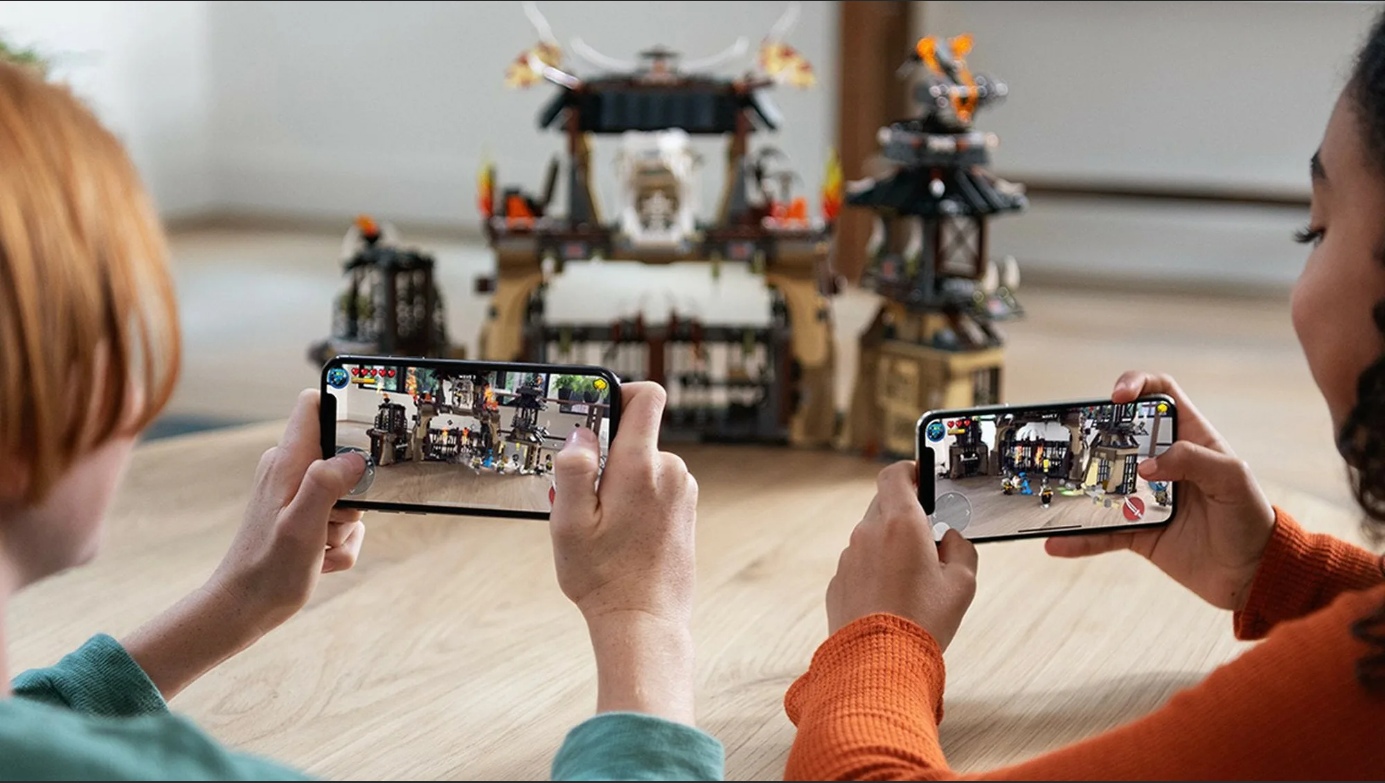
Interactivity
AR has an advantage over more traditional media like television or films in that we can design and create interactivity with the content in question. The more interactivity you add to your project, the more immersive it will become. Touch, swipe, browse – really engage your user in exploration down to the smallest detail! A really good example is the AR Pack we made for you as a template. This project is actually quite simple compared to some of the things you can create in Web-AR.Studio, however you should see how you can add additional levels of complexity to your project.
Template project: AR Pack. Interactive quiz
⠀⠀⠀
Conclusion
Like any good magician, starting small and perfecting the basics is the key to long-term success. Use these design tricks to create an immersive experience that users will come back to over and over again. Finally, don’t be afraid to experiment and innovate. AR is still in its infancy, and you have the opportunity to help define design conventions in an entirely new environment.
Greetings, dear reader! My name is Alexander, I am a photographer with 22 years of experience, and in this article I would like to tell you about an amazing discovery for me in the field of creating photo albums and personal photographs. To be honest, lately there have been a lot of young photographers who take away the client base that I have developed over the years. They set minimum prices, sacrificing quality, which leads to the fact that many customers during a pandemic turn to those who have cheaper, and not those who have better quality.
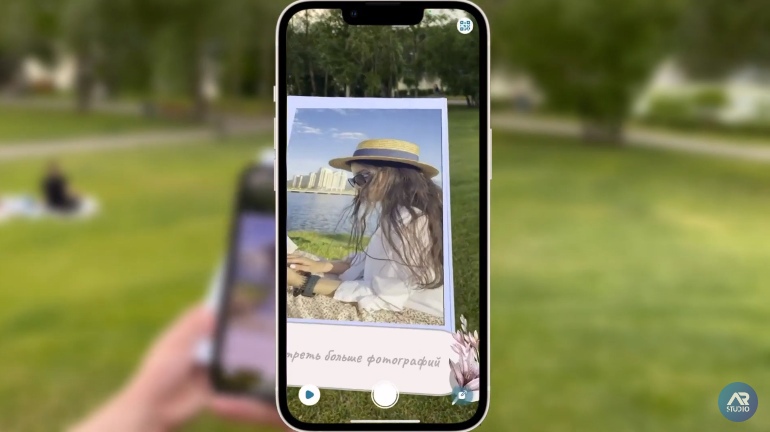
When I started thinking about how to get back some of my lost customer base, I found an interesting tool that is widely used in America. In Russian, it would be called “Live Photos” or photographs with “augmented reality”. Their meaning lies in the fact that WITHOUT downloading any mobile applications, simply by pointing the smartphone camera at the photo, you can “revive” the photo. That is, in your smartphone, instead of a regular photo, a video will be displayed on the screen (in place of the photo). As a result, a kind of cool effect of enlivening the photo is obtained. To create such photos without programming and 3D skills, you can use the only free augmented reality designer for photographers web-ar.studio
I have already seen before this reviving photos on the Russian market, which work through mobile applications and are extremely inconvenient, since you need to spend time searching for an application, registering, downloading and uploading certain projects. In addition to a heap of wasted time that your client will need, they will also have to donate space on their phone in order to view the project once. However, I was able to find a solution to these problems and this made me one of the most sought-after and technologically advanced photographers in my city. All my “come to life” photos work by QR-code, without the need to download mobile applications. In addition, in my projects, I can add not only video, as is done in applications, but also many other functionalities to photos: 3D scenes, mini-games, and much more. Also, on the platform I am using, there is access to its own editor, which applications do not have. Here I can add my own loading screen, domain and see analytics for any of the projects. As a result: we managed to return some of the old clients and acquire new ones, even from those who have already used reviving photos before.
I decided to change the approach to creating photo albums, in which there are general photos of the class of students and at the same time to make a short 15-second video of the moment from the photo at the same time. Thus, at the exit I got a photo, when you hover over which, there is a moment of photographing in a video format, for example, how the whole school class waves at the camera and smiles.
The effect is just “Wow!”, Nobody in my city makes such albums and photos so far, and now, in addition to ordinary photos, I propose to make more and these, which arouses great interest in examining my photo samples.
Also for this article, I shot a video in which I show how I animate a photo in just 1 minute – https://www.youtube.com/watch?v=OB2ul26j7Rs, at the end of this video is an example of what the “revival” looks like.
Here is one of my samples that you can see for yourself.
To watch: 1) Open the photo on your computer or laptop monitor.
2) Scan the QR code in the lower right corner through the camera (if you have an iphone or some types of Android) or the built-in QR code scanner app.
3) Point your phone at the photo that you have opened on the monitor.
If you liked my ideas for unusual photos, I will gladly take them for you or your family. Thank you for reading the article to the very end, I was happy to share my experience with you.
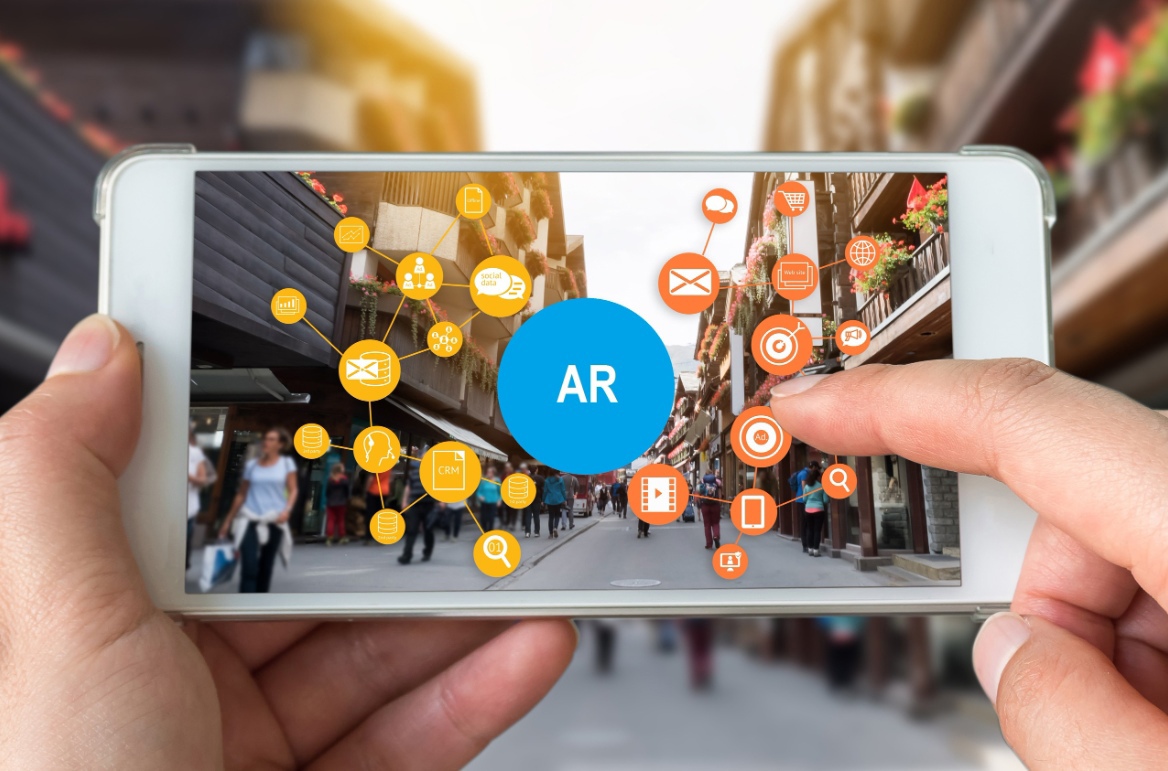
Augmented reality helps to launch an online project that will facilitate the work both for the ordinary user and for any business company.
With AR technology, the mobile app is no longer necessary. Downloading additional programs often made communication difficult – now the modern user is given the opportunity to go through QR-code scanning on the URL-address and interact with the AR-interface.
Here there is one tactic for entrepreneurs – to entice the user with «cool chips». And the sphere of commerce is pushed to a new level of WebAR-games, including educational. Consider two of them, which can be created in the free constructor WebAR Studio.
Quiz (quiz).
How to advertise the discount in an interesting format? Place an AR-package QR-code and compose quizzes on a thematic topic. If the action for the purchase of pizza – add more questions about this Italian dish (offer option: what combination of ingredients «Margarita»?).
The editor presents AR scene templates: the project creator does not need to compose everything from and to. Even there is a script for erroneous choice of answer. All you need to do is make the minimum changes: name, quiz questions, image for each stage.
3D Modeling.
This method has proven itself in the field of education. Private tutor or a special training center will help to show the difference between memorization and interactive games that will simplify the assimilation, at first glance, difficult to perceive material.
Maximum points will become more achievable. Foreign languages, physics, chemistry, algebra and geometry – the list can be continued indefinitely. Or, just out of curiosity, learn something off the curriculum – like the characteristics of any of the planets in the solar system.
AR technology is already a well-established scheme, as worthy and exciting to present a product or service from the fields of education, communication, maintenance, retail.
Implement your WebAR use options – develop the world for the better!
Narrative is changing, and augmented reality (AR) has established itself as a notable and permanent addition to our storytelling toolkit.
Because of this, we are seeing a huge increase in the number of UX and UI designers who are developing their skills to incorporate immersive design.
Even for the most seasoned UX designer, the transition to AR design takes training. Understanding how users interact with augmented reality as a means of storytelling is integral to creating a successful project, but credible research and knowledge in this area is hard to find.
Based on our experience in creating augmented reality projects, we have compiled a list of several tips for attracting users and avoiding augmented reality-specific pitfalls, as well as tips on how to get started.
⠀⠀⠀
Use platforms
The days when you had to be a master of programming in order to create projects with augmented reality are in the past. There are more than a handful of such projects on the market, built for designers with ideas but no coding or skill.
Platforms like Web-AR.Studio are specially designed to save you time learning to code, allowing you to quickly create augmented reality projects.
⠀⠀⠀
Think about your user’s non-virtual reality
Always keep context in mind when thinking about how your user will interact with your AR project.
Answer the simplest questions, such as where users will view your content. One of the greatest charms of AR is that it’s built to work as part of our reality, so make sure you refer to what your users’ reality looks like.
We recommend that you take the time to consider the circumstances in which you might interact with this project. Answer the questions:
Will users have a stable Wi-Fi connection?
How are they encouraged to scan and use your project?
How much time do you think they will spend on your project?
⠀⠀⠀
Offer a new way of looking at things
One of the funniest and most interesting aspects of AR is its ability to take a fresh look at reality. When creating your project, there is plenty of room to think about how you can flip or improve an old perspective.
The more you are aware of the context in which your augmented reality appears, the more opportunities you have to take advantage of that context and offer a new way of looking at the world. Remember that you no longer think about how the graphics will look on the page or on the screen: you have to think about how the content will be positioned in the real world.
⠀⠀⠀
Engage your user
When it comes to on-screen user interface, your user will always see the options you provided to them; however, AR presents a unique challenge with the variable distance in digital space between the user (and their device) and the content they interact with.
As always, it’s important to preview, test, and replay your augmented reality project as you work through different situations to make sure your interface scales properly and works against the given real-world background.
⠀⠀⠀
Make sure you have a clear call to action
Simply put, without a clear, compelling and directional call to action (placed directly on the print sheet or packaging, or if you’re running AR content in an app, then clear instructions and guidelines should be inside the app itself), you simply won’t be able to get people to interact. and enjoy your beautifully crafted augmented reality content. Directly on the physical object or packaging, there should be conspicuous instructions informing the user that they are offering an extra layer of content that they are already viewing.
Augmented reality is all about immersion, and your project should reflect the level of thought you’ve put into the experience you want your users to have. What will impress them? What will make them move away from interacting with your project to share with friends and colleagues?
By putting yourself in the user’s shoes and thinking deeply about how they interact with your creation, you can present a unique and special moment that will make your design memorable.
⠀⠀⠀
Conclusion
So there you have it, simple yet effective ways to improve your augmented reality experience. If you read these examples correctly, you should be on your way to creating fun, memorable and impressive augmented reality that not only pushes the boundaries of design, but also produces rewarding results.
Every year competition among photographers grows, so help keep afloat services that can increase the price without serious financial costs. Or compensate for the loss of the customer base with the influx of “fresh blood” when young photographers reduce the price tag and «steal» customers, even without an impressive portfolio.
Now some are learning to earn with the help of animated photos (remember the same wedding albums).
Their point is simple: Point your smartphone camera to the image, so that the photo you have displayed video. Thus, the effect of animation was born.
This is a way out for those who want to stay in the niche of portrait shooting and photo albums – for example, take a group photo from a high school graduation or general photo session and add a commemorative video backstage.
If you fill your hand, it takes only two minutes to create one photo. For this you will need a blank (ask the customer to take care of it, take samples) – photo, video and audio.
The project is created on a PC, without special software or other additional programs. In addition, do not worry about specialized knowledge and preliminary training. The trainer has already been prepared by the team and tested on real cases.
We understand – everyone wants to buy the service. The photographer, whose résumé is filled with a couple of living photos, will be a priority.
PS: To see how it looks on your smartphone, follow the instructions:
1) Go to the web-ar.studio site and on the home page you will see an example.
2) Scan the QR code into the camera (iphone/Android) or built-in scanner application.
3) Point your phone at the photo to be opened on the monitor.
One of WebAR’s «chips» is working on both sides: a) for the buyer: show the value of the product in an unusual way; b) for entrepreneurs (natural or legal person): help with loyalty to any brand and create a favorable environment for increasing sales.
If you look at the individual segments, you can see that this AR technology, like WebAR, optimizes the state of any business. Methods and applications are different, but the result is the same – a satisfied customer who will see a detailed analysis with data on the growing performance, for example, conversion (such stored in the personal account of each user of our platform).
1) Retail.
How to make a project with augmented reality: leave on the package QR-code with «surprise». For example, by clicking on the link you receive a souvenir/gift. We offer a discount option for the first purchase in the online store.
It’s actually a demonstration in the real world. WebAR allows you to correctly customize your experience, for example, personalize the style, style, color gamut of the product (if you take as the basis of mass market) without fitting in an offline store.
2) Digital agencies.
It is important not to miss the chance to make an impact, especially to create a good impression in negotiations with a potential client. How do you feel about the interactive presentation?
It seems to us an efficient way to immerse the client in the proposed concept, to most accurately convey the information to the interlocutor.
3) Corporate events and holidays.
Small business on the design and preparation of celebrations also have a place to go – offer a special AR-invitation in the form of immersive digital-solution (for a wedding or birthday). To do this, you need to print a card with a QR code and distribute to all guests. After clicking on the link, the invitation will reflect all information about the place and time.
4) Freelance photographers.
It is difficult for entrepreneurs in the common segment to find ways to pump their own product, competitive advantage. WebAR also makes it possible to offer an additional option – animate images. Multitracking works here – direct once the phone camera to QR-code and watch «short films». Two services in one – added here and video broadcasting.
AR-technology surprises more and more. Our examples of possibilities are not limited!
For the development of delicious rich content you will need a lot of creativity, because it is necessary to show the client a unique trading offer. To start is to create a presentable virtual image of the product, using augmented reality.
This innovative technology can positively affect the image of brands from various industries (construction, banking, education, e-commerce and so on). Augmented reality «wins» with classical creatives – the involvement of the audience is often twice as much due to the well-thought-out online interaction.
It is worth mentioning one of the applications of WebAR technology (SLAM – on this platform it will be in the beginning of 2023), thanks to the realistic design of 3D-models that the user can place on any horizontal or vertical surface, in life size. This allows you to see the product before buying and see if it is suitable for the design of the room, whether it has the required size.
An alternative application is WebAR using image recognition algorithms. This allows you to show a variety of information – from the composition of the sushi to AR games to receive brand prizes.
To test the AR-technology you need to go to the site by a link that pops up in the window after scanning the QR-code. It is convenient that you do not need to download the application – the buyer takes less action, that is, does not spend his personal time searching for the application, registration and installation and saves space on the phone. It gets into an interesting funnel – passes the tickets or AR-games, leaves contacts, meets with products, and most importantly – it can be targeted.
If this is an introduction to offline sources of attracting traffic, then you need to translate it online with the Facebook pixel connection. This generally increases not only the duration, but also the frequency of interaction with the brand.
That is, augmented reality – a working scheme to increase the conversion of advertising campaigns for several reasons:
unique type of offer;
It is not always possible to get to know the product in full detail here and now, which does not give, for example, a standard catalog or menu set.
increase of informative value (viewing goods in 3D, with detailed information);
Visualization of what a customer will receive when buying, or interactive information about its application through a QR code leading to a site with augmented reality.
the introduction contribute to the improvement of «word-of-mouth radio»;
«I called a friend, and he invited his» – attracting unique visitors thanks to its own know-how.
increased confidence in the product and producer;
It is about reducing risks, in situations where augmented reality allows you to familiarize yourself with the product before buying and minimize the number of returns. And when you use image recognition algorithms, your image is improved by introducing innovative technologies. This is surprising and attracts users.
Thanks to the introduction of this technology, domestic companies are already increasing the loyalty of their customers and achieving KPI, it is important not to lag behind, but ahead of the market. Creating a project with augmented reality will not take long – on our online designer Web-AR.Studio it can take a couple of minutes. The process on this platform is simple and understandable, it can be seen on YouTube, projects work on smartphones, both iOS and Android.
On the platform there are templates for creating projects from any industry, there are also built-in libraries of various special effects and 3D models.
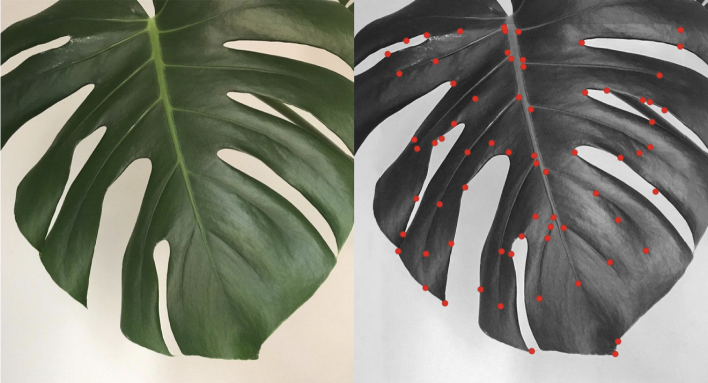
Image recognition is based on the number of key points that the platform can find on the loaded image (trigger). The more points – the faster and more stable tracking will work.
To prepare a good marker, pay attention to the following characteristics:
⠀⠀⠀⠀⠀
High contrast
The difference in tones helps you find more points in the image.
As you can see, various details are hard to stand out, since contrasting transitions are very difficult to see.
An example of a good marker:
Contrasting transitions between the subject and the background are visible.
⠀⠀⠀⠀⠀
No repeating shapes or patterns
The same or similar objects negatively affect recognition and tracking.
An example of a marker with many of the same shapes and patterns is a bad marker:
Why is that bad? There are a lot of corner points in this image, but they are repeated, therefore, the tracking will be unstable, because the points will be confused with each other. Better not to use such images.
⠀⠀⠀⠀
A large number of details
The more unique elements in the image, the better it will be recognized.
An example of a good image with a lot of detail:
⠀⠀⠀⠀
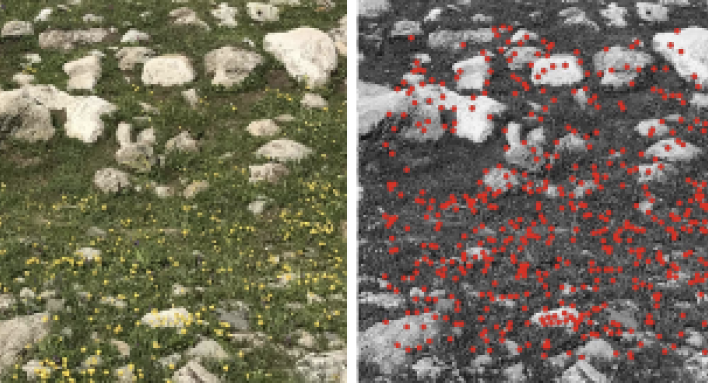
Distribution of special points
For high-quality tracking, it is necessary that the singular points are evenly distributed over the image.
An example of poor distribution of points:
As you can see, most of the points are distributed in one corner of the image, which will negatively affect tracking.
Is there a way to avoid this without changing the marker? Yes, you can simply crop the image, or add additional elements so that most of the points are not in one corner of the marker, but are distributed over the plane of the entire image.
an example of a good image with a lot of detail:
⠀⠀⠀⠀
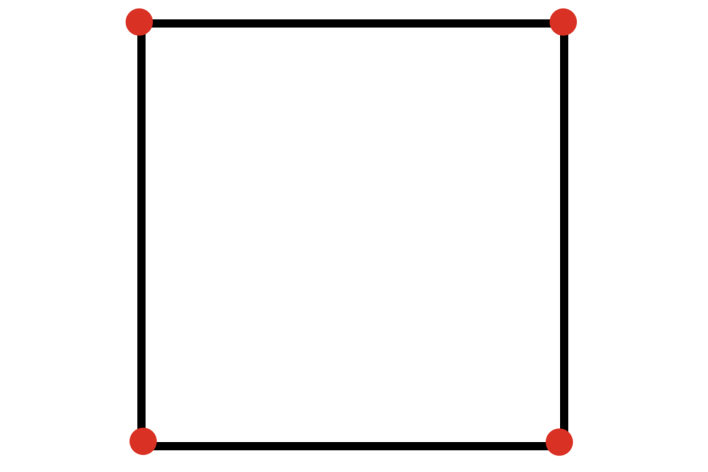
Use square and angular shapes
They provide more key points than round objects. Round shapes have no sharp transitions, so tracking will deteriorate.
Bad figure example:
We see that there are no abrupt transitions to “catch” here.
Although the square has 4 corners, which are easy to identify … such a figure is not used for one simple reason – the square is symmetrical, therefore, it becomes impossible to determine the orientation in space (try rotating the square 90º – nothing has changed … in this and the problem of this figure as a marker):
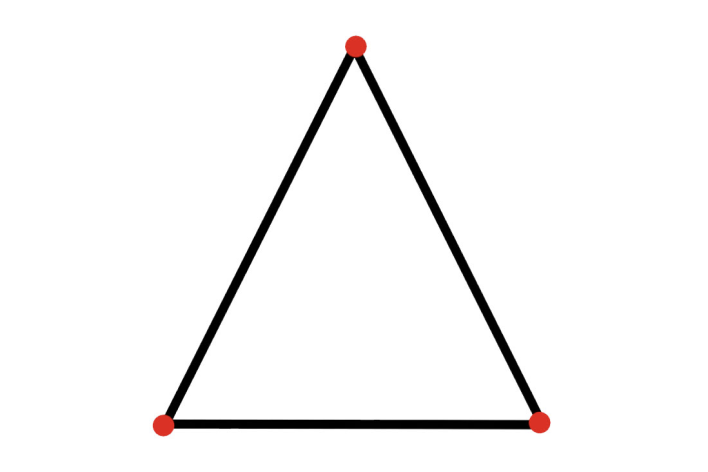
An example of a great shape is a triangle.
⠀⠀⠀⠀
The Feature – Exclusion Buffer
As you can see in the images above, the points are not placed over the entire marker … About 8% of the unaffected space remains (even taking into account the fact that there are objects in this zone that could be “attached”). This space is an exception buffer — no points are initialized in this area.
You can avoid this situation by simply adding a white border around the future marker (approximately 8% of the width). In the images below, there will be an example of a bad marker and a good one.
When there is no frame, precious information is lost (it is worth taking a closer look at the areas that are close to the edge of the marker):
If you add a white border, the information will not be lost:
⠀⠀⠀
Supported image formats
Web-AR.Studio supports various image formats including:
.PNG
.JPG
.JPEG
If your image file is not supported or exceeds the size limit, you can compress it and change the file format using one of the graphics editing applications.
⠀⠀⠀
Let’s take a look at each format separately.
PNG is a storage format for raster (an image that is a mosaic of pixels – colored dots) images. Was designed to replace the GIF format.
The advantages of this format: Lossless compression – the quality remains excellent at any compression ratio, Compact file size, Works great with colors (higher color range than GIF), When re-saving a file, the quality does not deteriorate, Transparency support.
Disadvantages of this format: Sometimes, the format may be poorly supported on different browsers, Poor work with full color images (photos, illustrations) – the size is higher than that of JPEG (JPG) and GIF.
Программы для работы с PNG:
Adobe Photoshop
Microsoft Windows Photos
Movavi Photo Editor
Microsoft Paint
Apple Photos
GIMP и т.д
⠀⠀
JPG (JPEG) – is the most common bitmap compressed image format. Used to store photographs and similar images.
The advantages of this format: Controllable compression ratio – you can choose the ratio of quality and file size, Format universality – works correctly in all browsers and on all devices, Good quality with low compression ratio.
Disadvantages of this format: Each compression step degrades the quality (several pixels “merge” – smooth transitions between colors disappear), Loss of color detail on compression (stems from the disadvantage above), The format does not support transparency, Not optimal when working with text graphics.
Программы для работы с JPEG:
Adobe Photoshop
Adobe Illustrator
Microsoft Windows Photos
CorelDRAW
Movavi Photo Editor
Microsoft Paint
Apple Photos
GIMP и т.д
⠀⠀
Conclusion
Download not in vector, but in raster format
If there is no raster, or even the raster itself somehow reflects due to the material – take a picture of the image and upload the photo
If you really really need the image to be recognized, but the algorithm does not start up, then look where the algorithm has highlighted the green and yellow squares. You can crop this part of the photo and the image will work, but only this part will be recognized. We specifically determine whether the image is suitable or not and we can say that it is not suitable, even if there are green and yellow squares in there to say that the whole image is poorly recognized and will be a bad trigger